Before your card end date, you may need to back up emails from your University (Nexus365) email account. This guide will show you how to back up your emails to other mail accounts.
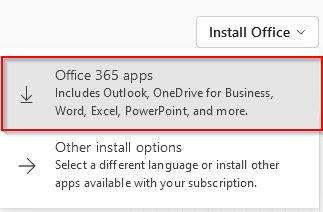
All the methods outlined in the guide require the use of the Outlook for Desktop app, which is free with your university account. To download and install Office apps, navigate to https://office.com, log in with your SSO details, and then on the landing page near the top right of the screen, click on Install Office, then Office 365 apps on the drop-down menu.
This will download a file, and if you run the file, it will install Outlook to your machine (Windows or Mac).
The first and easiest method of backing up your emails is using the built-in tool in Outlook. This takes a local backup of your emails and stores them in a .pst file if on Windows, and an .olm file on Mac.
For Windows:
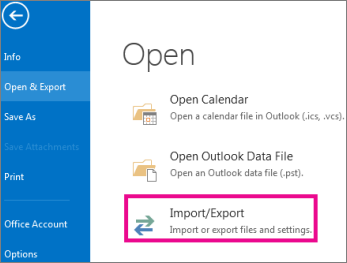
Select File > Open & Export > Import/Export.
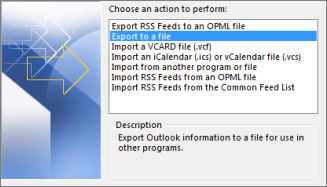
Select Export to a file, and then select Next.
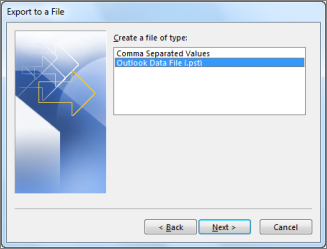
Select Outlook Data File (.pst) and select Next.
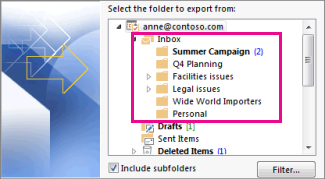
Select the mail folder you want to back up and select Next.
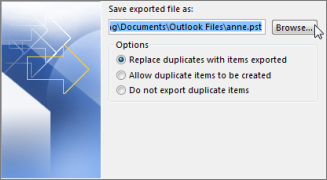
Choose a location and name for your backup file, and then select Finish.
For Mac:
On the Tools tab, choose Export.
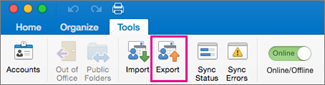
Note: Don’t see the Export button? Make sure you have the latest version of Outlook. On the Outlook Help menu, click Check for Updates. If all Outlook updates are applied, and you still don’t see the Export button, look for Export on the Outlook File menu.
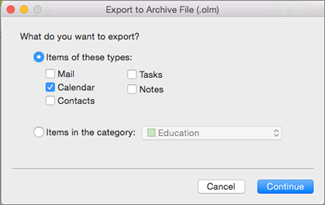
In the Export to Archive File (.olm) box, check the items you want to export, and choose Continue.
In the Save As box, choose the desired backup folder and choose Save.
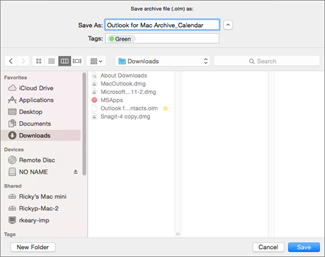
Once your data has been exported, you will get a notification. Choose Finish.
The backup files (.olm and .pst) can then be imported as needed into another mailbox.
An alternative method of backing up your files is to load up your alternative account on the Outlook desktop app. The example we’ll show you below is for Gmail, but other mailboxes should work the same. You will need your Gmail address and password.
For Windows:
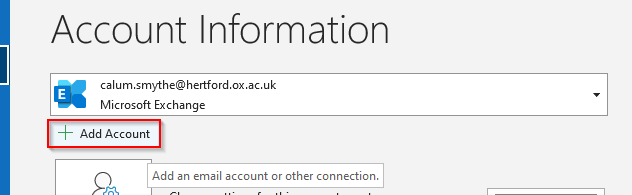
Go to File > Add Account
A pop-up window will appear, enter your Gmail address in the box and click Connect:
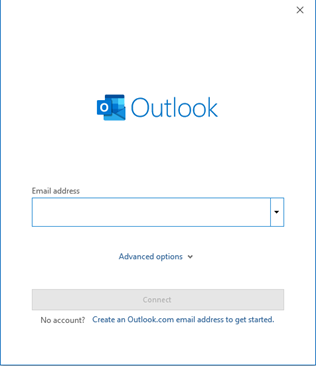
After clicking connect, you will be prompted to enter your password, enter it and click Sign In:
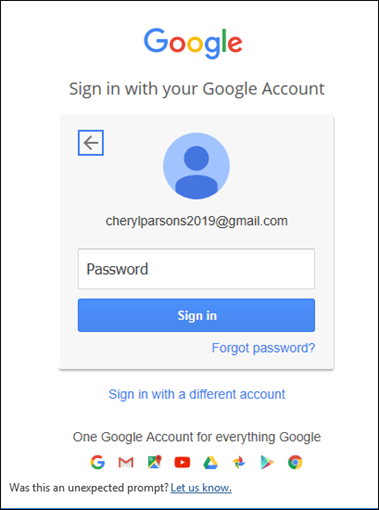
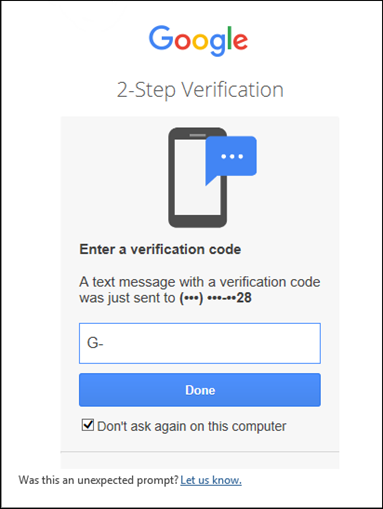
If you have previously enabled 2-factor authentication for Gmail, you’ll be prompted to enter the code sent to your mobile device. If you haven’t enabled 2-factor authentication, skip to the next step.
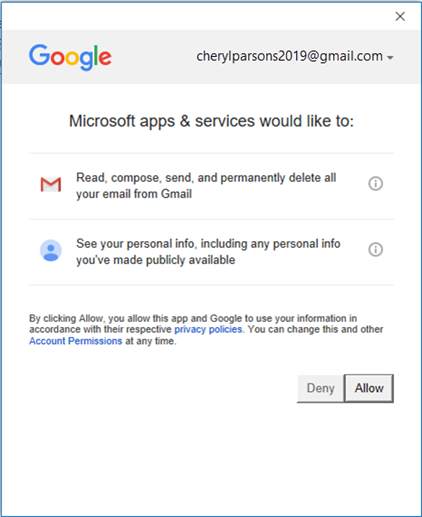
The Google account permissions window appears, select Allow.
Once Outlook finishes adding your Gmail account, select Done.
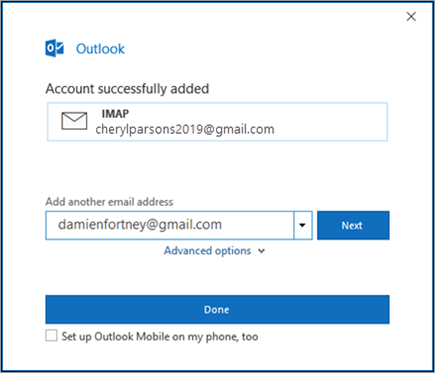
Once added, you can move emails from your Nexus365 account into your Gmail account, simply highlight the emails you would like to move (hold CTRL while clicking to select multiple emails) and, when you’re done, right-click, go to Move and then choose the folder you would like to move them to.
Please note, if moving lots of emails, you may want to create a dedicated folder for Nexus365 emails to avoid confusion.

The emails may take a few seconds to minutes to copy over, depending on how many you are copying. Once done, you will be able to view them in your Gmail mailbox.
For Mac:
Select Outlook > Preferences > Accounts
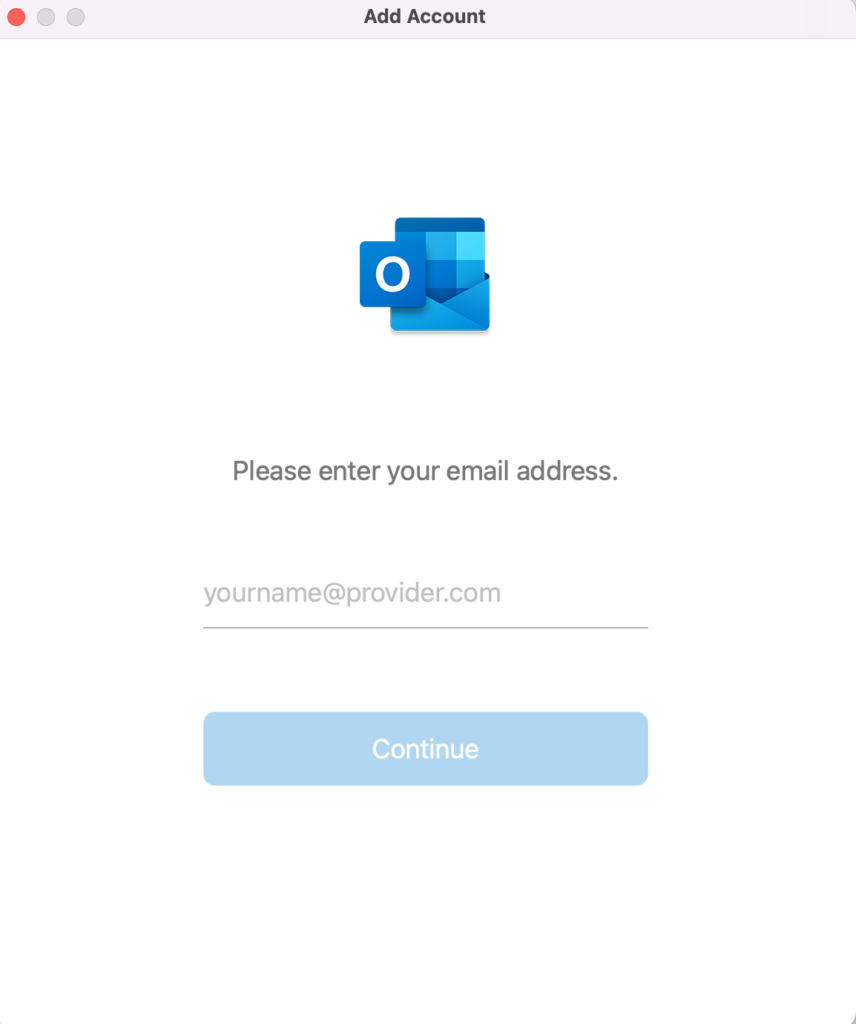
Click the + sign and then New Account

On the screen that pops up, enter your Gmail address, and click Continue, then if prompted enter your password.
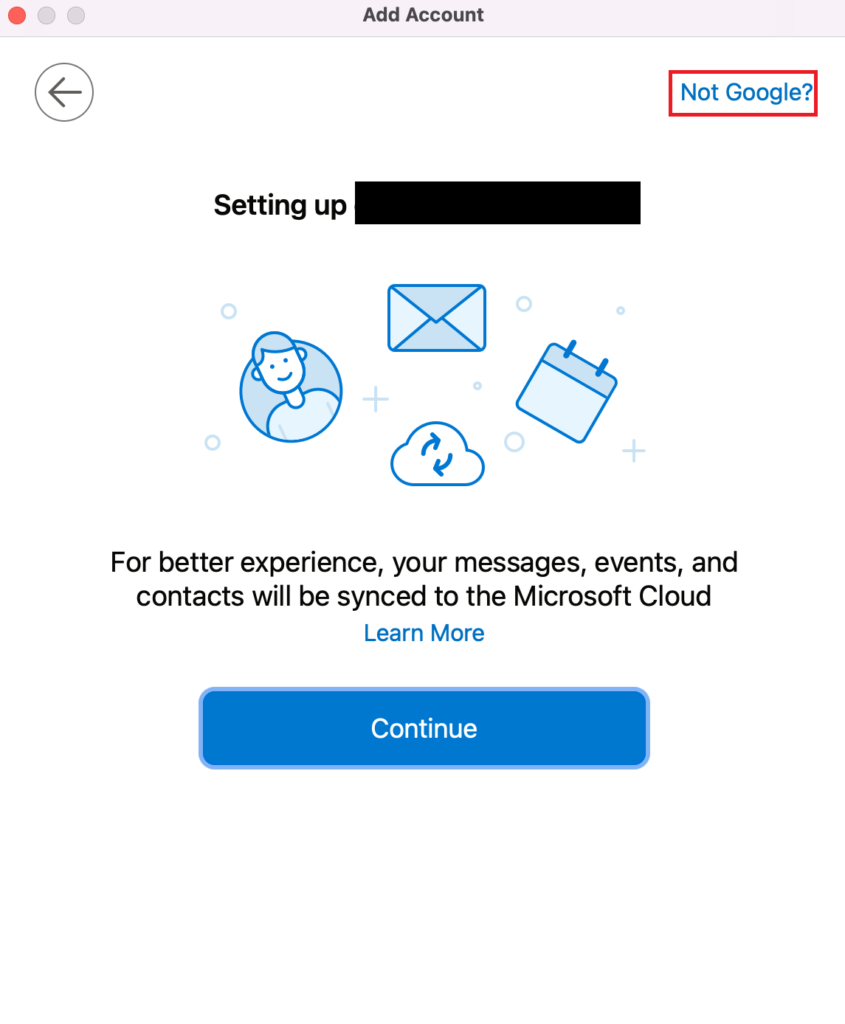
You will be prompted with a confirmation screen, click on Not Google? in the top right.
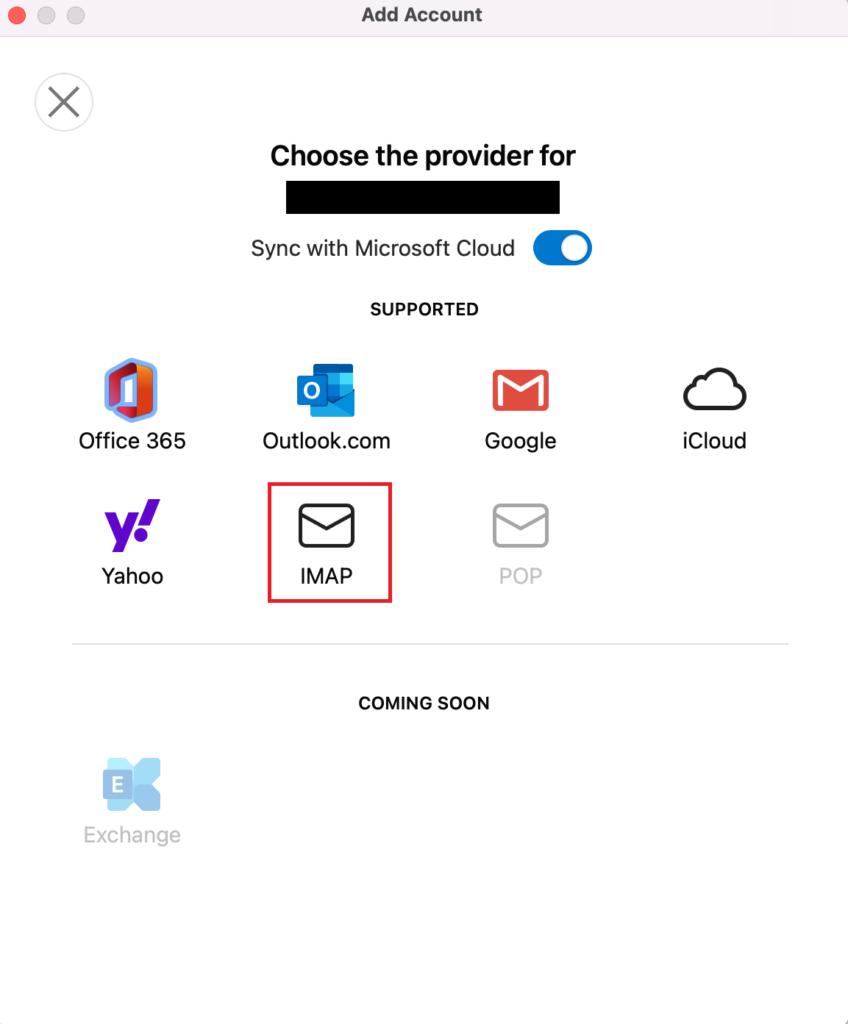
Then, click on IMAP.
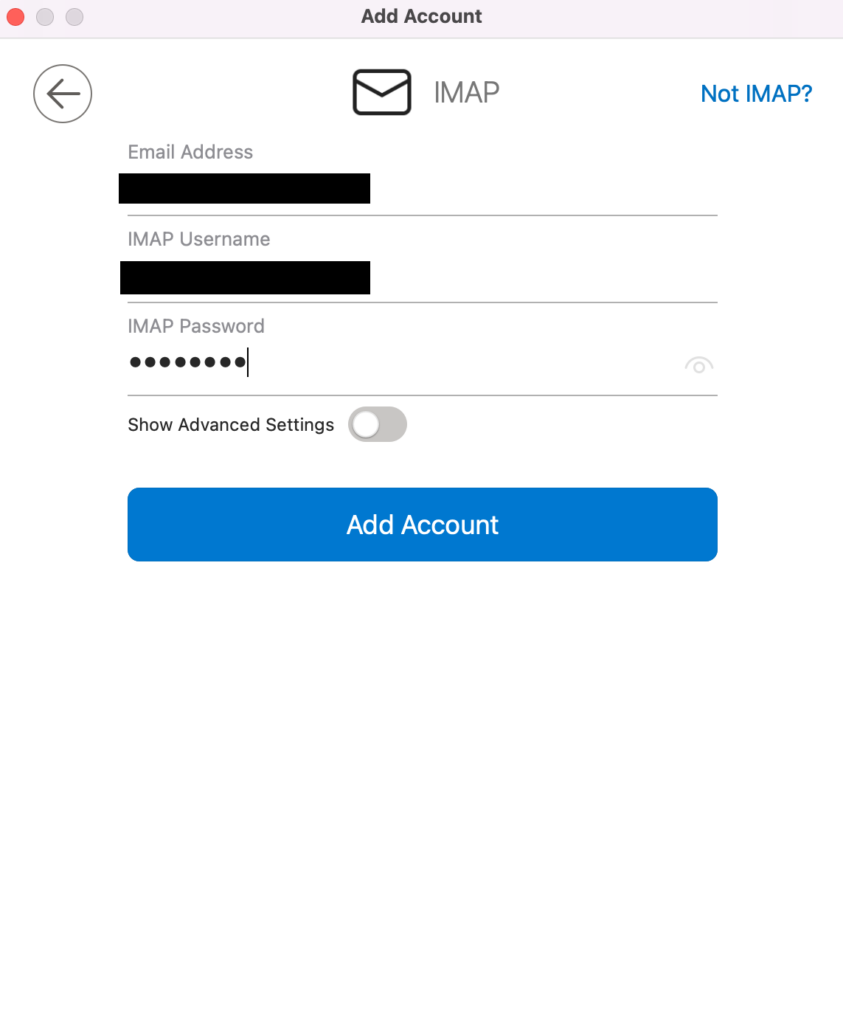
If prompted to enter your password again, please do so.
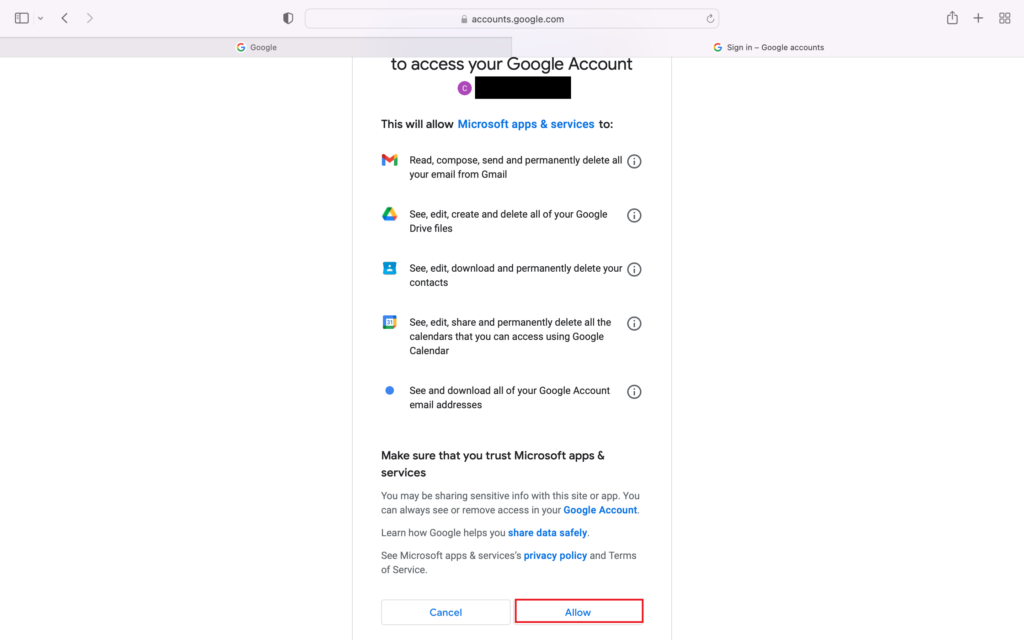
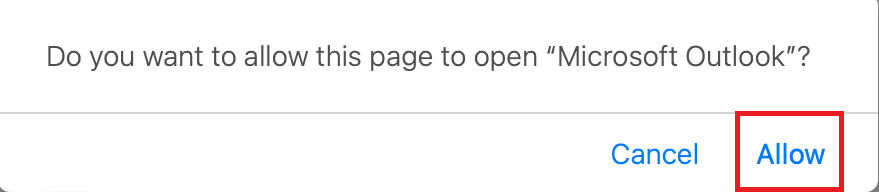
Your web browser should then open a window, prompting to give Microsoft access to your Gmail address; click Allow.
Finally, Allow the browser to re-open Outlook.
Once done, you will see the Gmail account in Outlook for Mac. You will now be able to move and copy emails from your Nexus365 Account. To do so, simply highlight the emails you would like to copy (you can select multiple if you wish), then right-click and select Move > Copy to Folder.
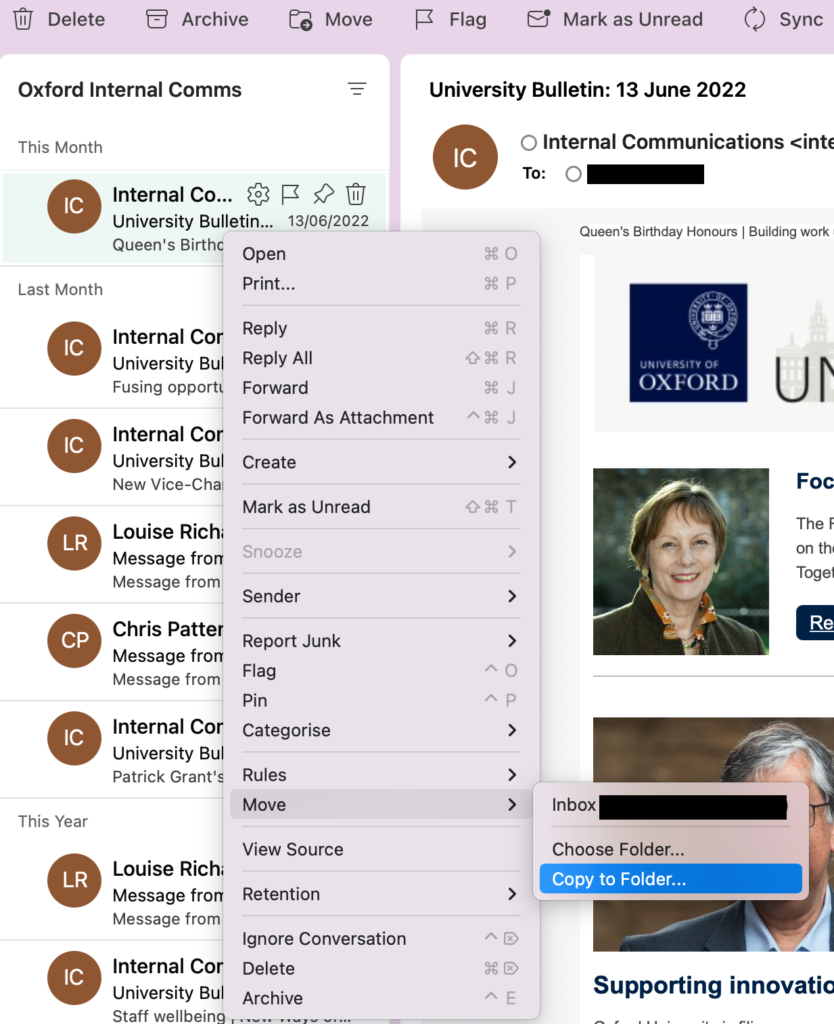
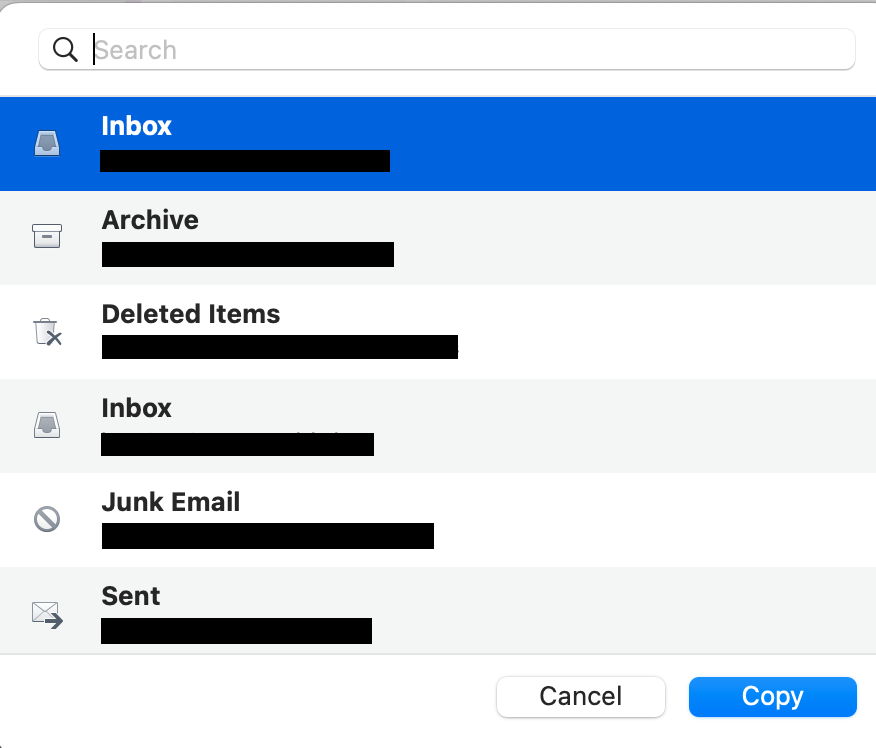
Then, select the folder and email address you would like to move the emails to (Please note, if you’re copying lots of emails you may wish to create a dedicated folder for Nexus365 email to avoid confusion), and finally click Copy.
The emails may take a few seconds to minutes to copy over, depending on how many you are copying. Once done, you will be able to view them in your Gmail.